
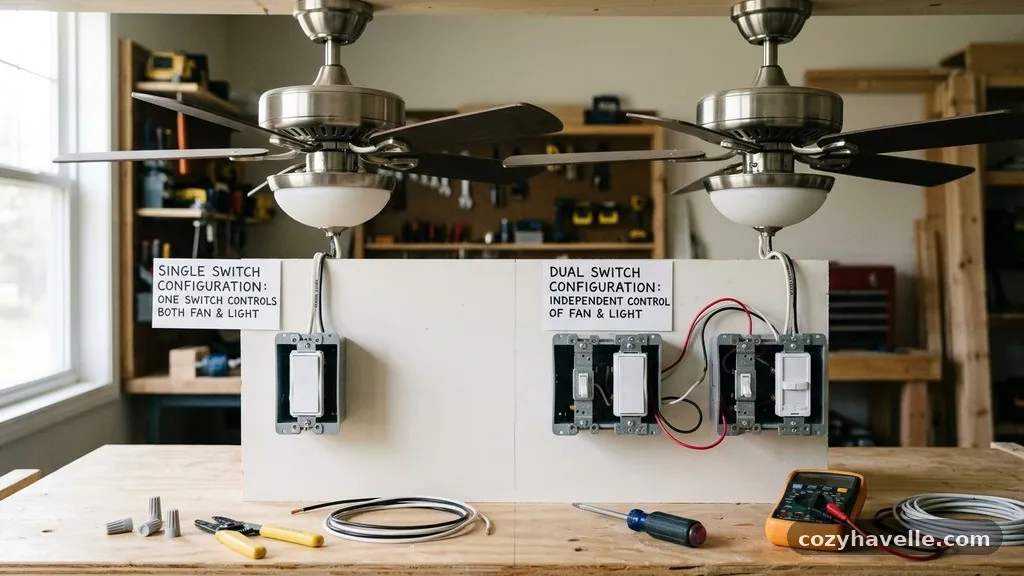
Wiring a Ceiling Fan with Light on a Single Wall Switch vs Dual Switches
Deciding between wiring a ceiling fan with light on a single wall switch vs dual switches often comes down to balancing convenience with the existing electrical infrastructure in your home. While a single switch setup uses your current wiring to control both the fan and light simultaneously, a dual switch configuration offers independent control, allowing you to run the fan without the light or vice versa.
Understanding the fundamental differences between these two methods will help you determine if your home’s current cabling can support an upgrade or if you are limited to a simpler installation. Mastering the technical requirements ensures your ceiling fan operates safely and efficiently for years to come.
The core difference in functionality
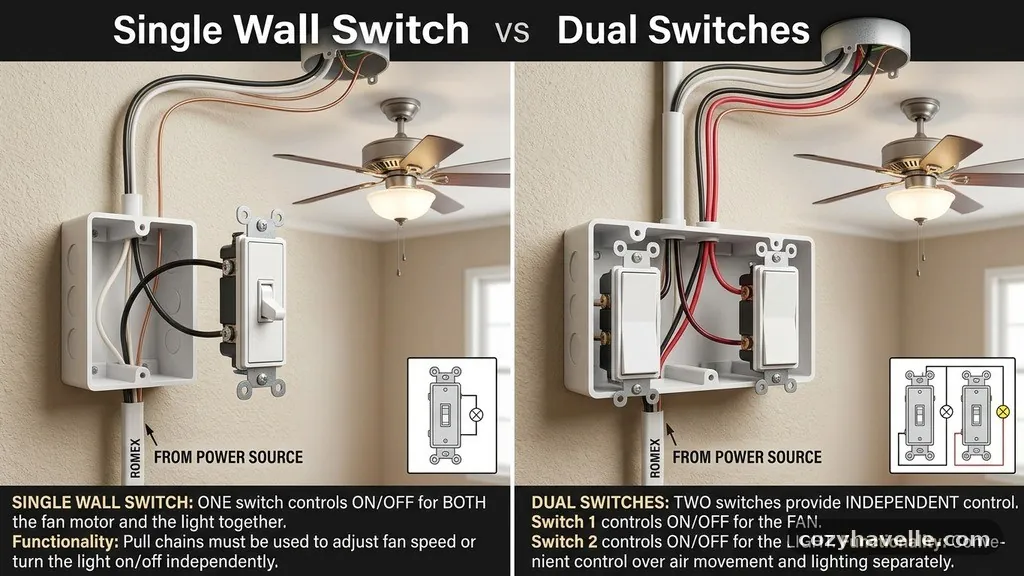
The primary distinction when choosing between these configurations is independent control. In a single switch setup, the power is delivered to the fan and the light kit simultaneously through a single hot wire. This means you must rely on the fan’s integrated pull chains or a remote control to operate the light and fan motor separately.
Conversely, a dual switch setup requires an extra conductor to carry power to the fan and the light independently. This allows you to toggle the wall switch for the light and the fan independently, which is often considered more ergonomic for daily use in living rooms or bedrooms.
Assessing your existing wall wiring
Before you begin any installation, you must identify what type of cable is currently inside your electrical junction box. Most standard lighting circuits are wired with /2 Romex, which contains a black hot wire, a white neutral wire, and a bare copper ground wire. This configuration is only sufficient for a single wall switch setup because it lacks the extra “hot” wire needed for separate control.
If your wall box has /3 Romex—which includes a red wire in addition to the black, white, and ground—you likely have the necessary infrastructure to install a dual switch. You can verify this by using a voltage tester to identify the purpose of each wire inside the housing.
Installation challenges for single switch setups

Installing a ceiling fan on a single switch is generally the most straightforward process for a DIY enthusiast. You simply connect the black and blue wires from the fan to the black hot wire coming from the ceiling, and the white neutral wires together. The main drawback is that you are tethered to the pull chain or the remote receiver to adjust settings.
If the fan is mounted on a high ceiling, reaching the pull chain can be a significant inconvenience. In such cases, many homeowners opt to install a fan-rated remote control receiver inside the canopy to simulate the convenience of multiple switches without actually pulling new wire.
The technical requirements for dual switch control
Upgrading to dual switches is a more labor-intensive project because it requires running a new /3 Romex cable from the switch box to the ceiling junction box. The red wire typically serves as the second hot wire, allowing you to route one switch to the fan motor and the other to the light kit. You must ensure that your electrical junction box is rated to handle the weight and vibration of the fan motor according to current NEC standards.
Failure to use a proper fan-rated box can lead to structural instability or electrical hazards as the motor generates torque. Always confirm that your circuit breaker is off before touching any exposed wiring.
Comparison of wiring approaches
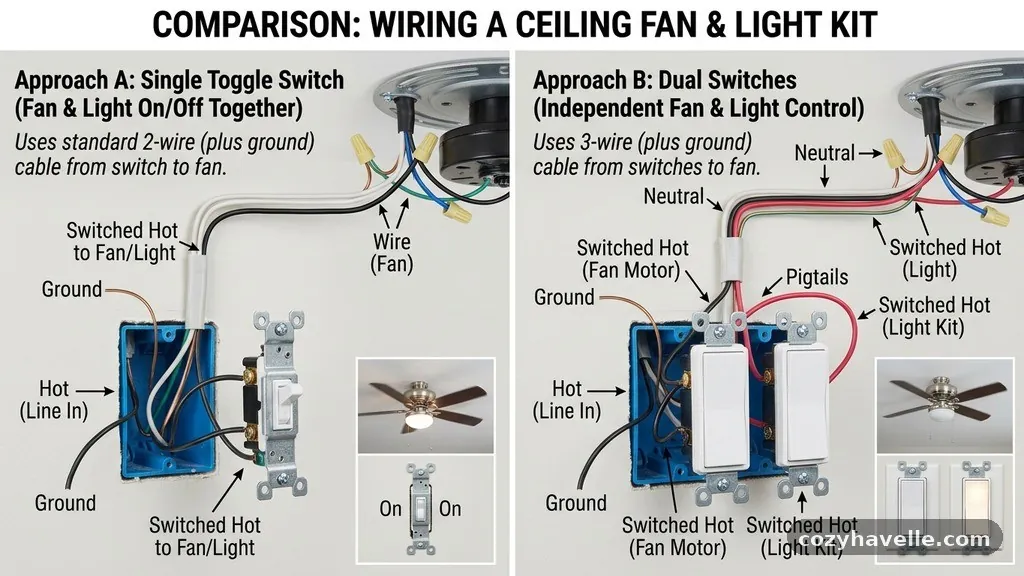
When comparing the two methods, the choice often depends on your willingness to perform wall repairs or fish new wire through existing joists. The following table highlights the key differences between these two common installation strategies for ceiling fan control.
| Feature | Single Switch | Dual Switch |
|---|---|---|
| Wiring Cable Required | Standard /2 Romex | /3 Romex (with red wire) |
| Control Method | Pull chain or remote | Dedicated wall switches |
| Installation Difficulty | Low to moderate | High (requires new wiring) |
| Cost of Materials | Minimal | Moderate (cable + extra switch) |
Common components in fan wiring
Regardless of the switch configuration, the interior of your ceiling fan canopy is a busy junction of wires. You will typically find a black wire for the fan motor, a blue wire for the light kit, a white neutral wire, and a green or bare ground wire. Using high-quality wire nuts is essential to ensure a secure connection that won’t loosen due to the vibration of the fan blades.
If you are using a remote control receiver, it acts as an intermediary, taking power from the wall switch and distributing it to the specific components based on the signal it receives. Always check the manufacturer’s manual, as some modern fans have specific color-coding that deviates from standard household wiring conventions.
Safety considerations and electrical code
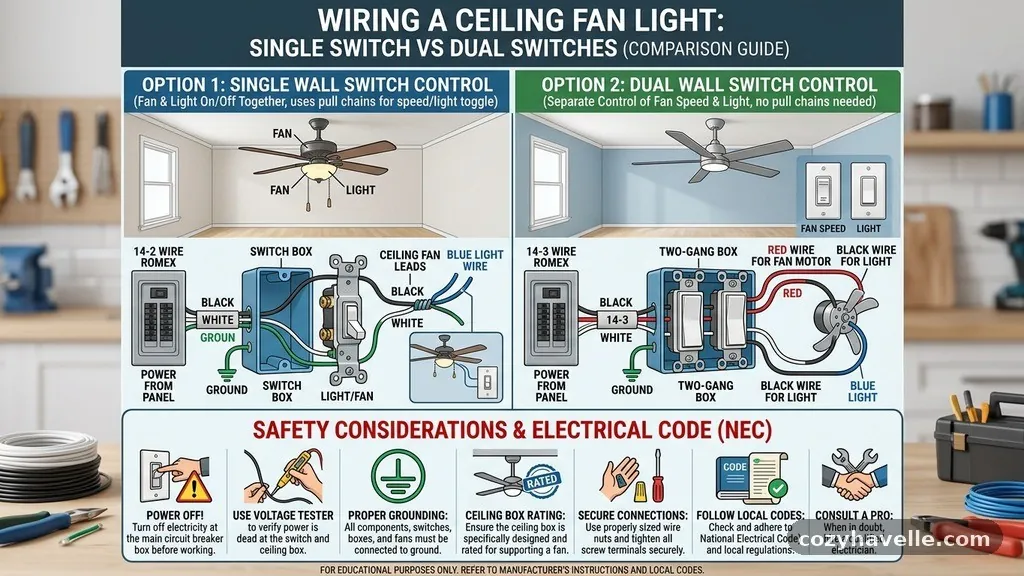
Adhering to electrical code is non-negotiable when dealing with ceiling fan installations. The NEC standards mandate that all electrical connections be made inside an approved junction box to prevent fire hazards. You must also ensure that the ground wire is properly attached to the grounding screw on the mounting bracket to protect against electrical faults.
If you are uncomfortable working with high-voltage lines, hiring a licensed electrician is the safest path forward. Remember that improper connections can lead to flickering lights, humming fan motors, or even damaged circuit breakers if a short circuit occurs.
Troubleshooting common wiring mistakes
One of the most frequent errors is misidentifying the hot and neutral wires during the final connection. If the fan runs but the light doesn’t work, it is often due to a loose wire nut or a faulty connection between the light kit’s blue wire and the power source. Another common issue occurs when the remote receiver is installed but the wall switch is left in the “off” position, effectively cutting power to the remote itself.
Before assuming the fan is defective, always check the connections inside the canopy and ensure the wall plate is properly grounded. If you notice any burning smell or sparking during the initial test, turn off the breaker immediately.
Tools you will need for the job
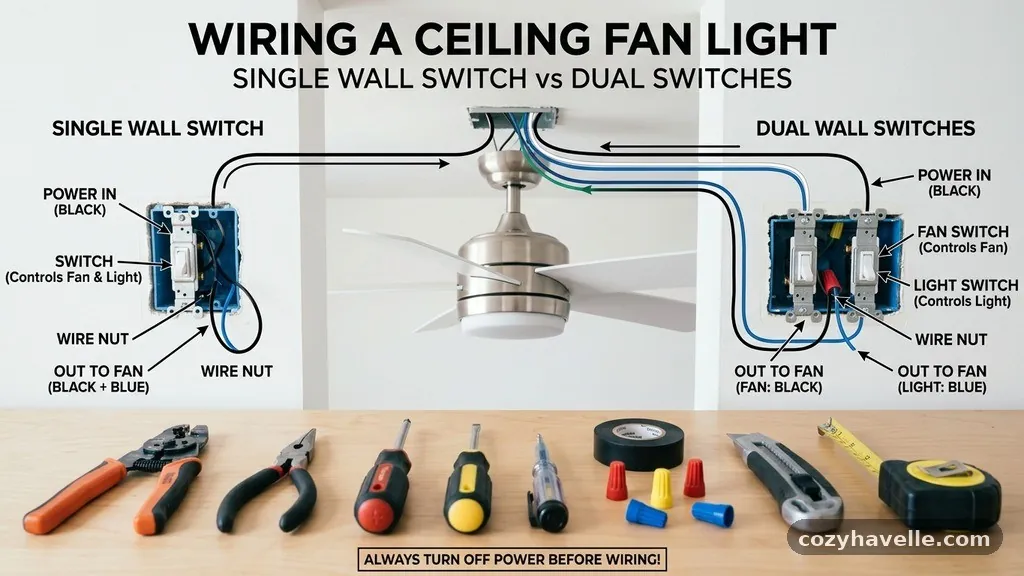
Properly wiring a ceiling fan requires a specific set of tools to ensure safety and precision. You will need a reliable pair of wire strippers to remove the insulation without nicking the copper conductors. A non-contact voltage tester is vital for confirming that the power is truly off before you start, as relying solely on the wall switch is insufficient.
Having a set of insulated screwdrivers and needle-nose pliers will help you maneuver the wires into the tight space of the fan canopy. Do not forget to keep a roll of electrical tape on hand to wrap your wire nuts, providing an extra layer of protection against accidental shorts.
Benefits of using a remote control system
For many homeowners, the best solution when stuck with /2 Romex wiring is to bypass the need for a second switch by installing a remote control system. A remote receiver fits neatly inside the housing of the fan, allowing you to control both the light and the fan speed wirelessly. This provides the functionality of a dual switch setup without the need to tear into drywall or pull new wire through the attic.
It is a modern, efficient way to upgrade your home’s comfort level while keeping the labor costs relatively low. Most high-end fans now come with these receivers pre-installed or included in the box.
Frequently asked questions
Can I install a ceiling fan and light with one switch?
Yes, you can easily wire a ceiling fan and light to a single wall switch by connecting both the fan’s black motor wire and the light’s blue wire to the single hot wire from the ceiling. You will then control the light and fan speed individually using the pull chains attached to the fan housing.
What are the common mistakes to avoid when wiring a ceiling fan?
The most common mistakes include failing to use a fan-rated electrical junction box, neglecting to connect the ground wire, and using loose wire nuts that can fall off due to motor vibration. Always ensure the circuit breaker is fully off before starting and verify with a voltage tester.
Can all ceiling fans be wired to a wall switch?
Most ceiling fans can be wired to a wall switch, but some modern models with built-in remote receivers are designed specifically for “always-on” power. If you have a remote-only fan, wiring it to a wall switch might interfere with the receiver’s ability to maintain its memory settings.
What if my fan has a blue wire but my ceiling only has two wires?
If your ceiling only has two wires—a hot and a neutral—you can still connect the blue wire for the light kit to the same hot wire as the black motor wire. This means the light will always turn on when you flip the wall switch, and you can then use the pull chain to toggle the light independently.
Conclusion
Choosing between wiring a ceiling fan with light on a single wall switch vs dual switches is a decision that balances your desire for convenience against the realities of your home’s electrical layout. A single switch setup remains the standard for many homes due to its simplicity, while a dual switch configuration offers a more polished, independent control experience if your wiring allows for it.
Regardless of which path you take, prioritize safety by using the correct junction boxes, ensuring all connections are secure, and verifying your work with a voltage tester. By taking the time to understand your home’s electrical system, you ensure a reliable, long-lasting installation that enhances both the comfort and functionality of your living space.